> ## Documentation Index
> Fetch the complete documentation index at: https://docs.withbind.com/llms.txt
> Use this file to discover all available pages before exploring further.
# Onboard Items
> Efficiently adds store-owned & consigner Items to your inventory with the Onboard Items feature, streamlining listing across Shopify channels with designated sizes, conditions, and pricing.
## About
Admins and Employees can onboard items, designating them as store-owned or consigner inventory. Once created, an item is available for sale on Shopify Web and POS if it's the lowest-priced item.
## Onboard Item
Upon clicking the **Onboard Items** button from the [Product Overview](/platform/catalog/product-overview) page, you'll be redirected to the Onboard Items page.
### Ownership & Location Selection
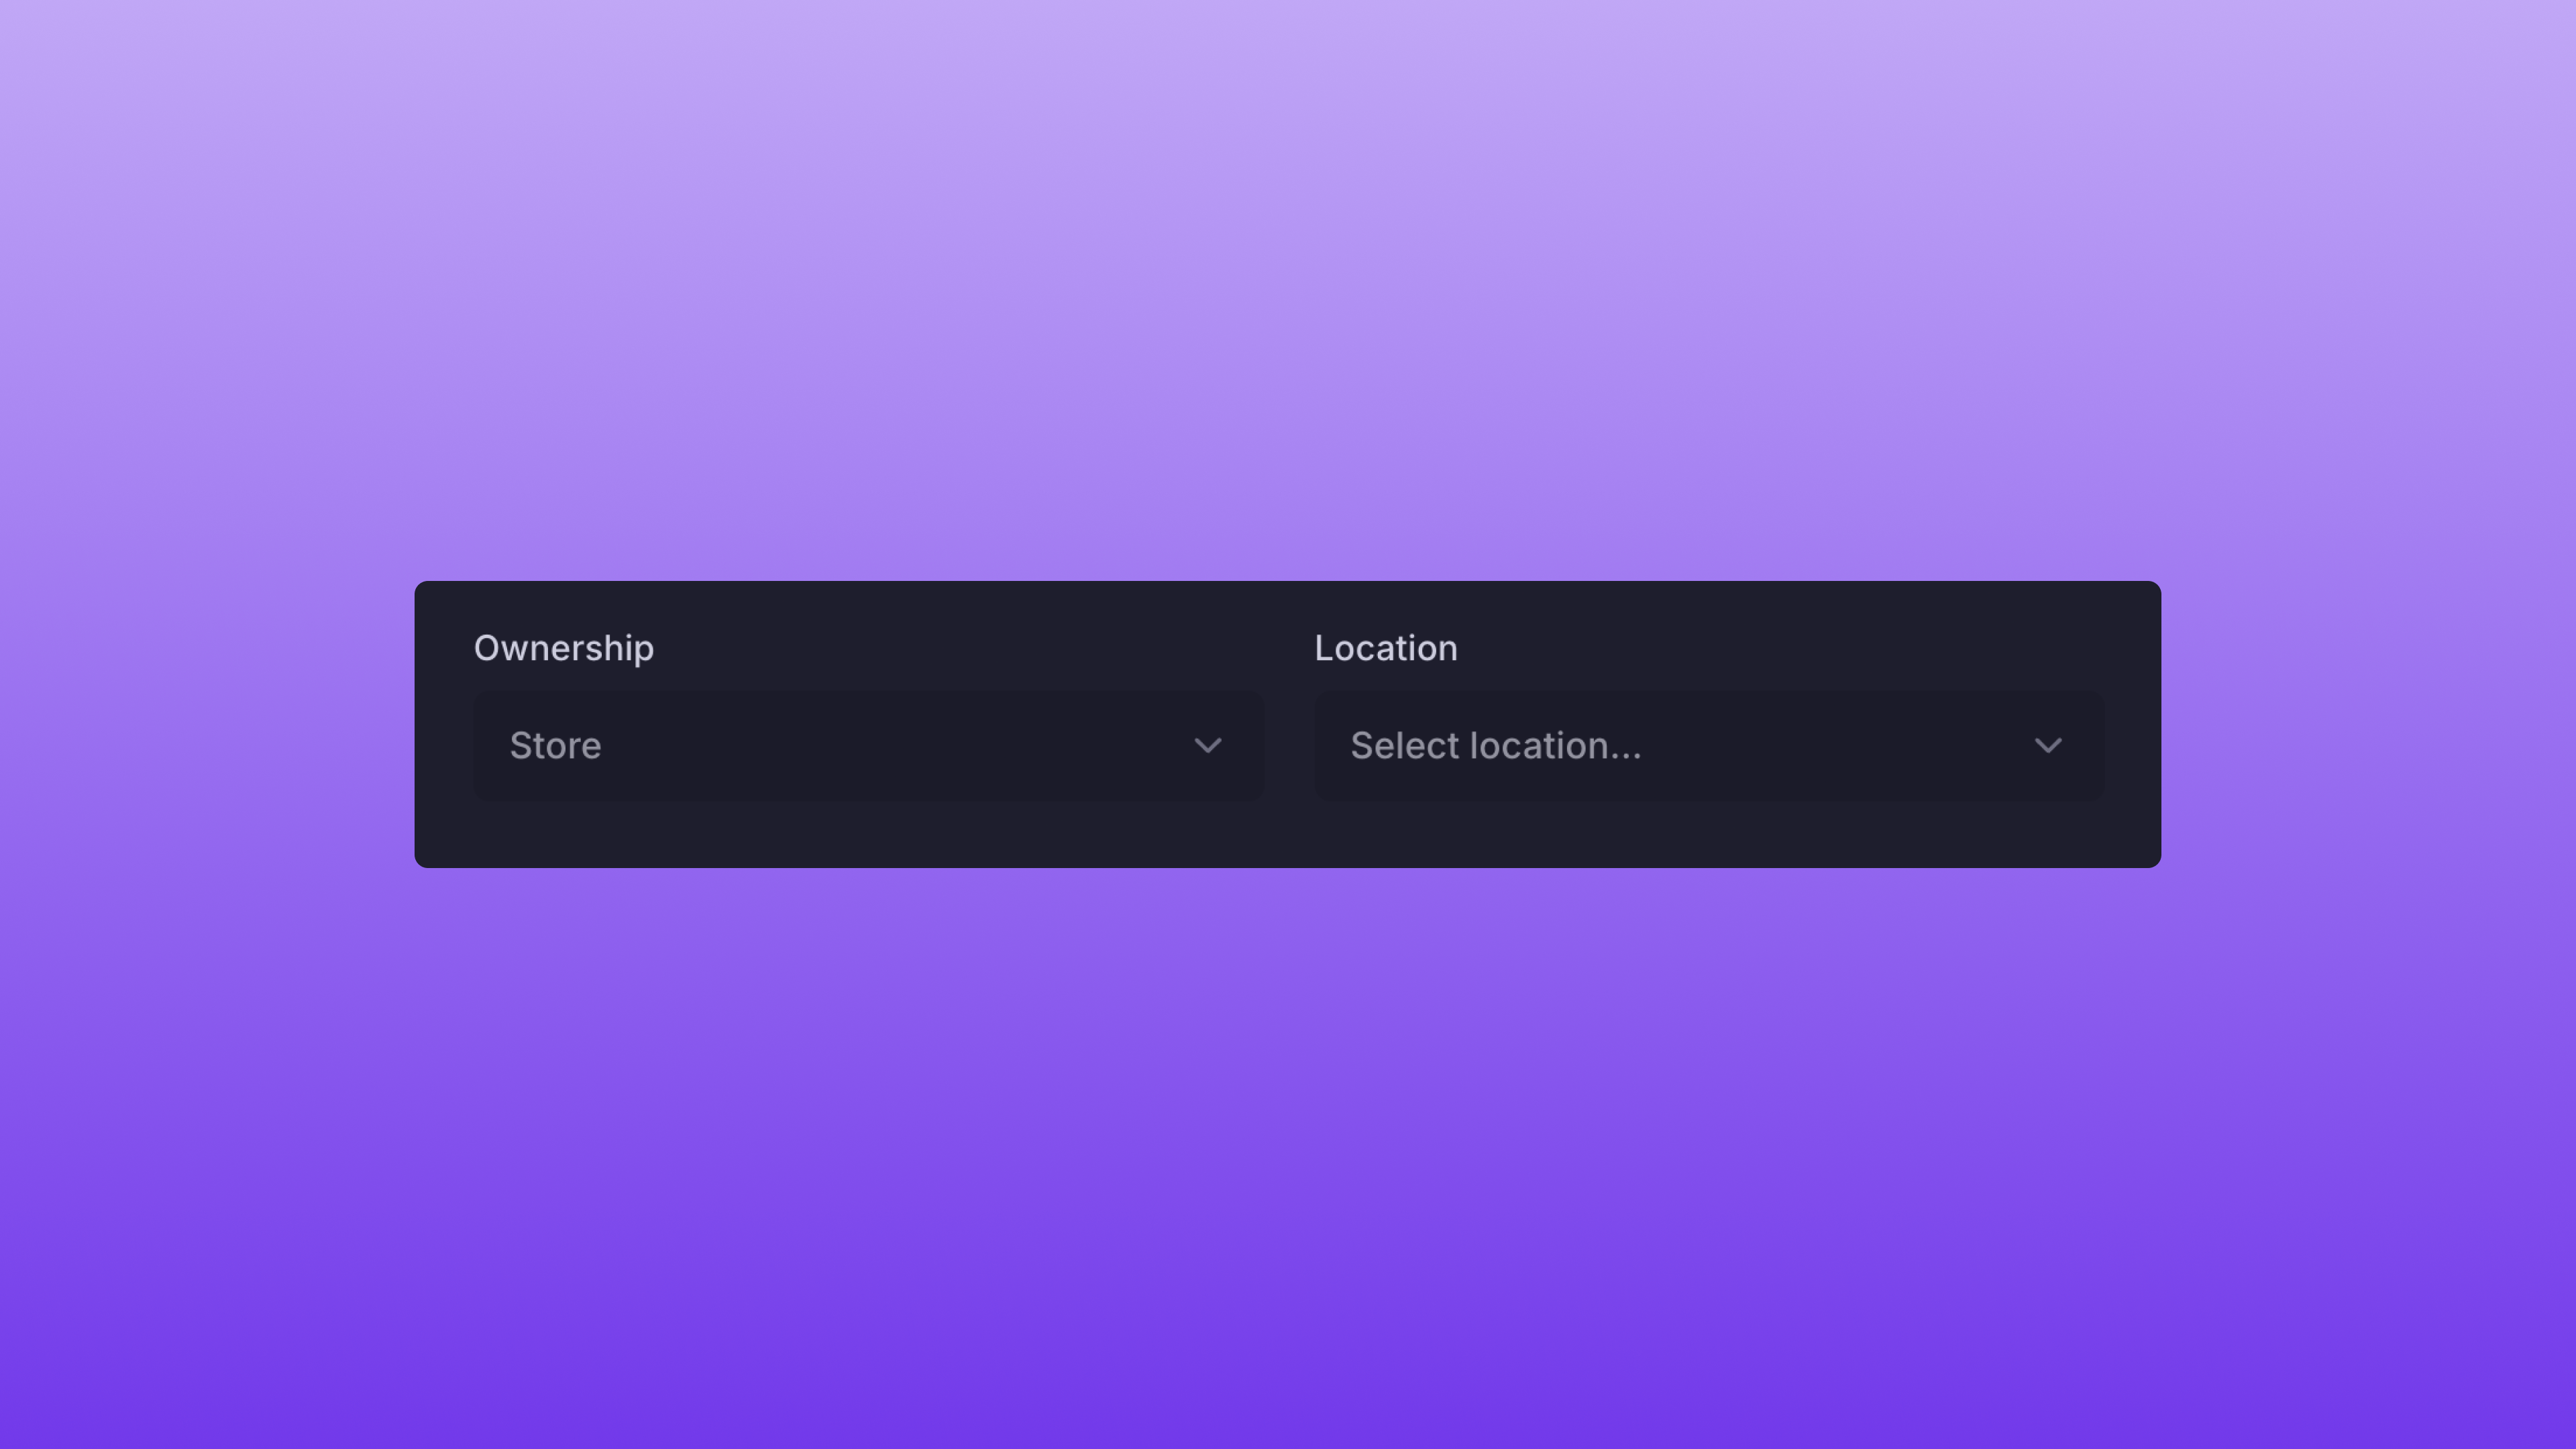 After clicking the **Onboard Items** button, you'll see two drop-down boxes to assign Ownership & Location. Ownership will default to store-owned, with the ability to select any consigner as needed via the dropdown.
To assign a Location to the Items, select the dropdown and pick the correct location. The Locations displayed are derived from your Store Settings.
### Size Selection
After clicking the **Onboard Items** button, you'll see two drop-down boxes to assign Ownership & Location. Ownership will default to store-owned, with the ability to select any consigner as needed via the dropdown.
To assign a Location to the Items, select the dropdown and pick the correct location. The Locations displayed are derived from your Store Settings.
### Size Selection
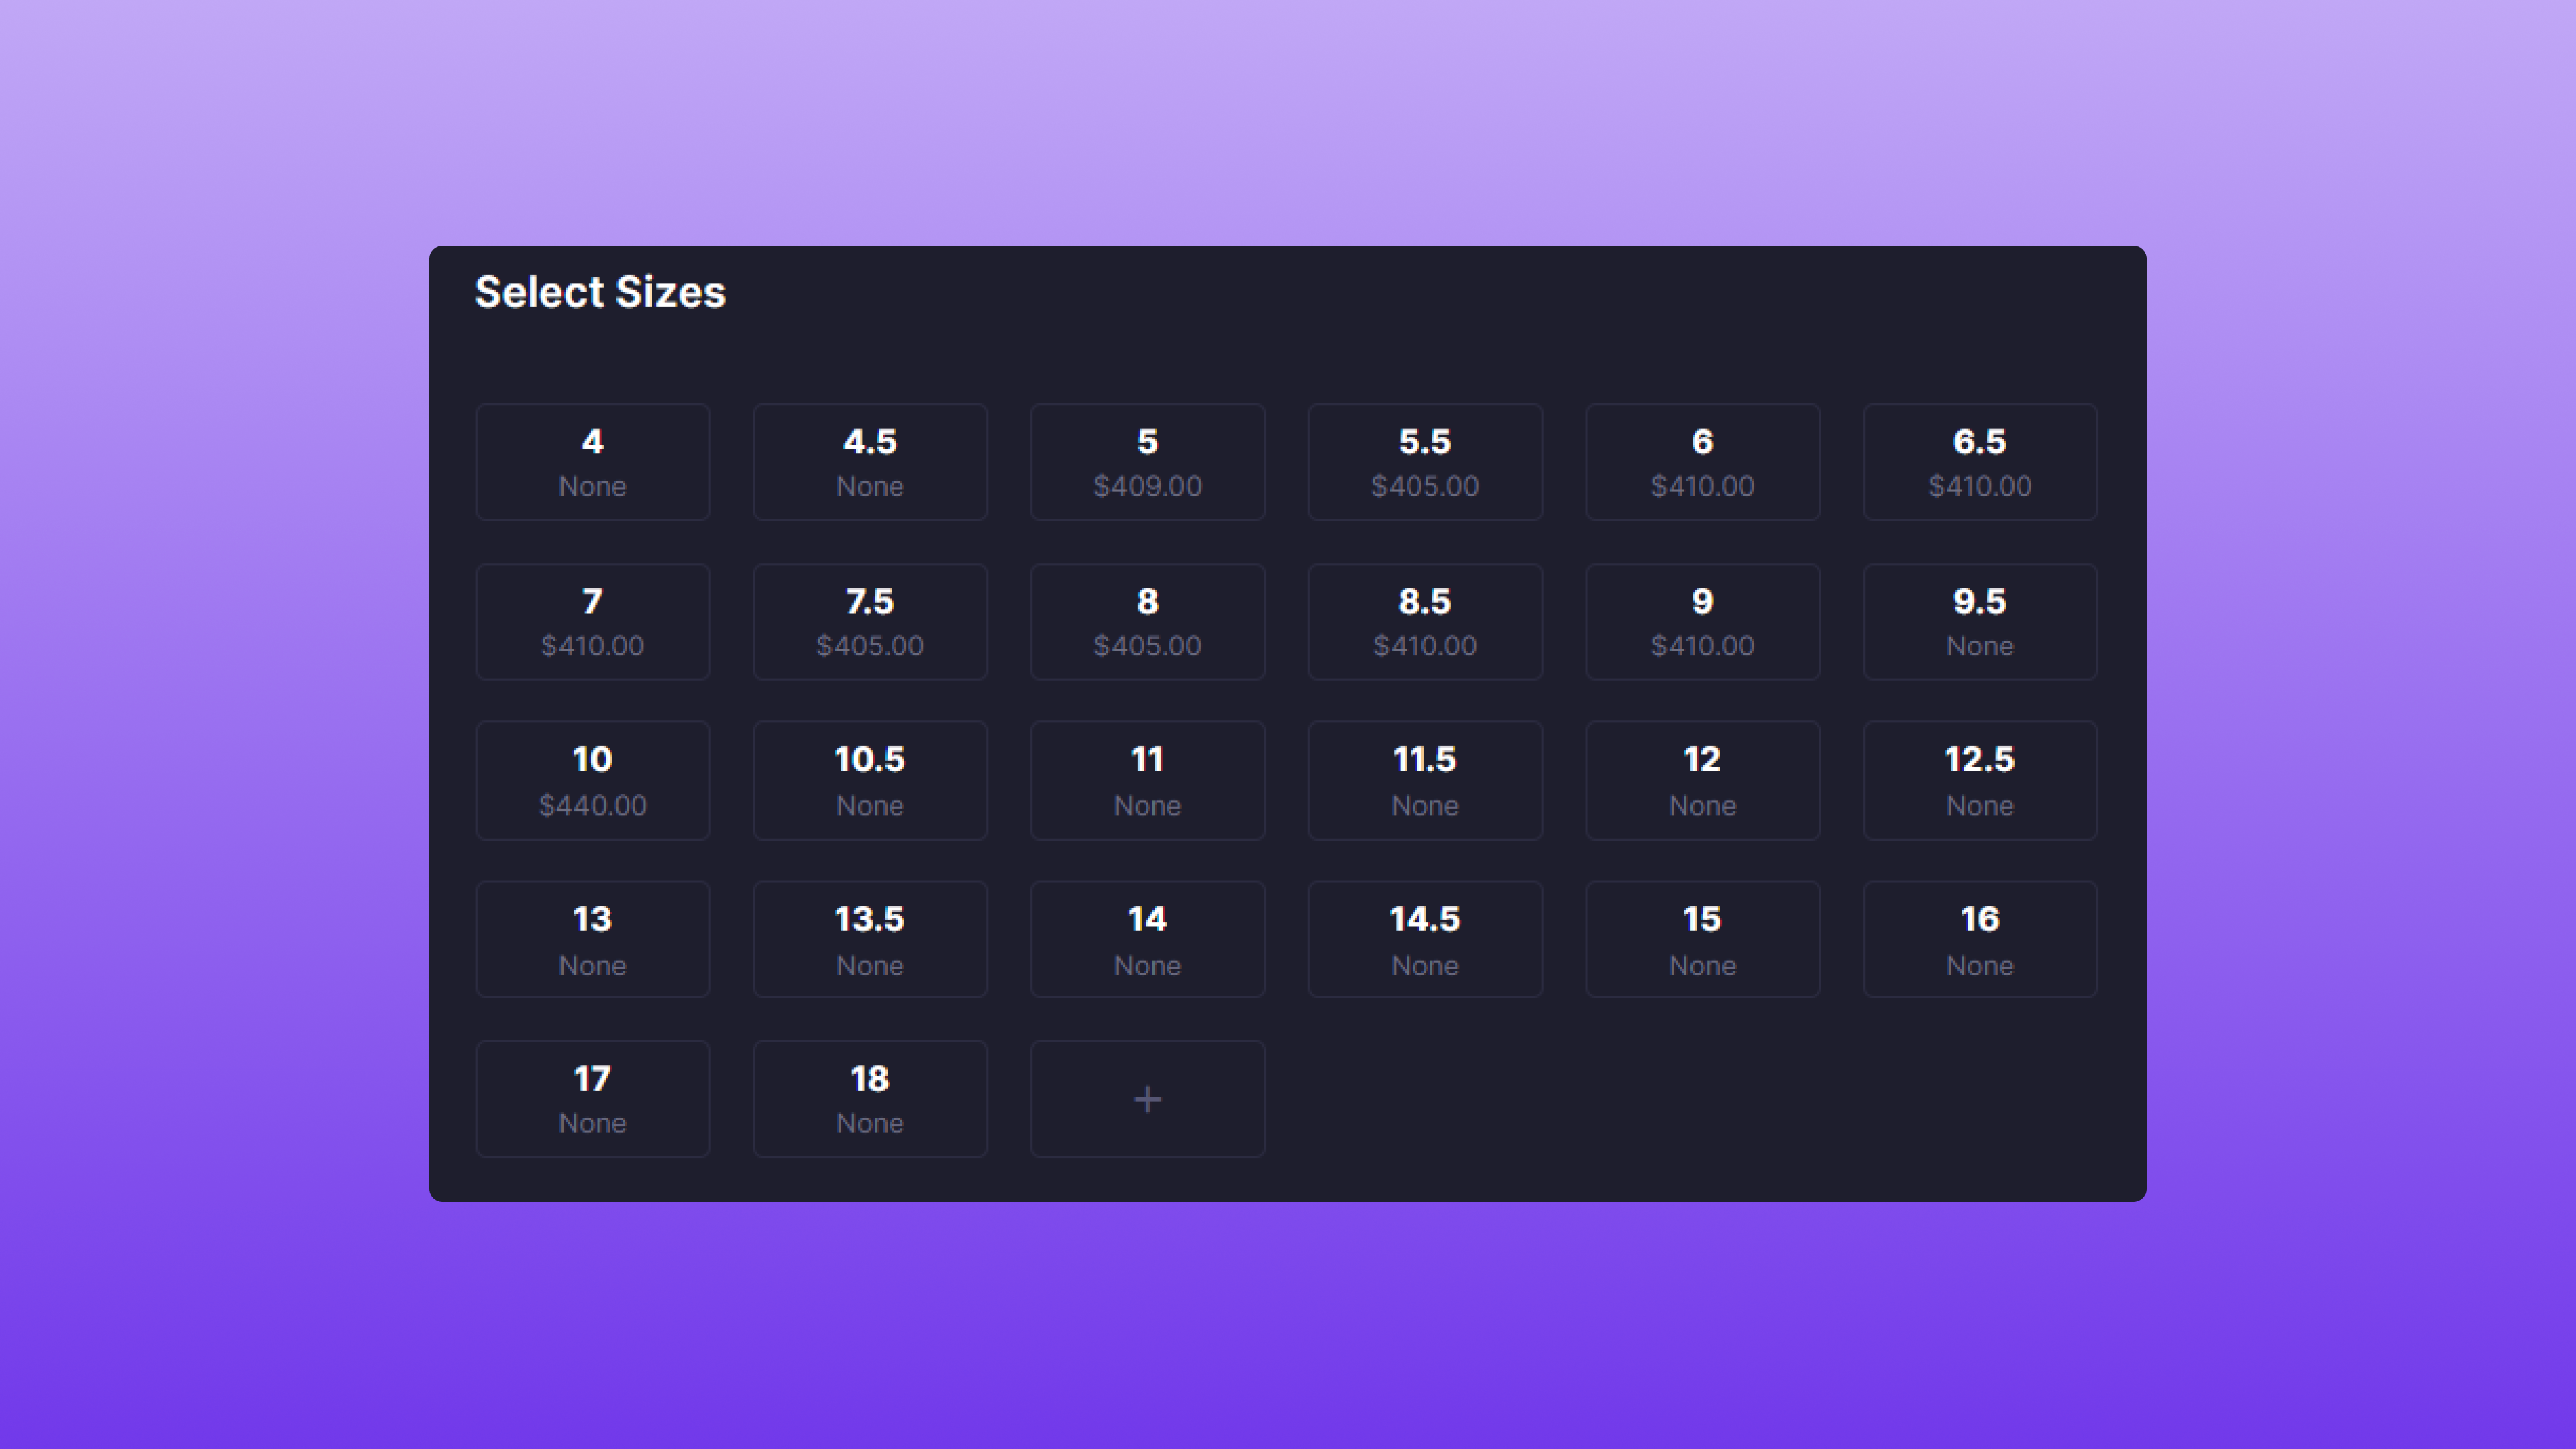 After clicking the **Onboard Items** button, you'll see a sizing chart that displays the lowest Active Item price for each size. If the size does not exist in the store's inventory, **None** will be displayed. Once a size is clicked, it'll create a new row within the table with the selected size populated.
If default sizing is not available, you can click the **+** icon. A blank size row will be added to the table to allow custom size input.
### Condition Selection
To assign a condition to the Item, simply select the dropdown and pick from the following options.
* **New**
* **Pre-Owned**
* **New (Rep Box)**
* **Pre-Owned (Rep Box)**
### Currency Amount Input
Finally, assign the Item's **Paid Price** and **List Price**. Here's a quick breakdown of each value:
* **List Price**: Dollar amount (whole number) representing the price the Item will be sold at.
* **Paid Price**: Dollar amount (cents supported) representing the Item's cost.
With Bind, the profit of sold Items and potential payout amounts are automatically calculated.
### Onboard the Items
Here's an example of a correct form:
After clicking the **Onboard Items** button, you'll see a sizing chart that displays the lowest Active Item price for each size. If the size does not exist in the store's inventory, **None** will be displayed. Once a size is clicked, it'll create a new row within the table with the selected size populated.
If default sizing is not available, you can click the **+** icon. A blank size row will be added to the table to allow custom size input.
### Condition Selection
To assign a condition to the Item, simply select the dropdown and pick from the following options.
* **New**
* **Pre-Owned**
* **New (Rep Box)**
* **Pre-Owned (Rep Box)**
### Currency Amount Input
Finally, assign the Item's **Paid Price** and **List Price**. Here's a quick breakdown of each value:
* **List Price**: Dollar amount (whole number) representing the price the Item will be sold at.
* **Paid Price**: Dollar amount (cents supported) representing the Item's cost.
With Bind, the profit of sold Items and potential payout amounts are automatically calculated.
### Onboard the Items
Here's an example of a correct form:
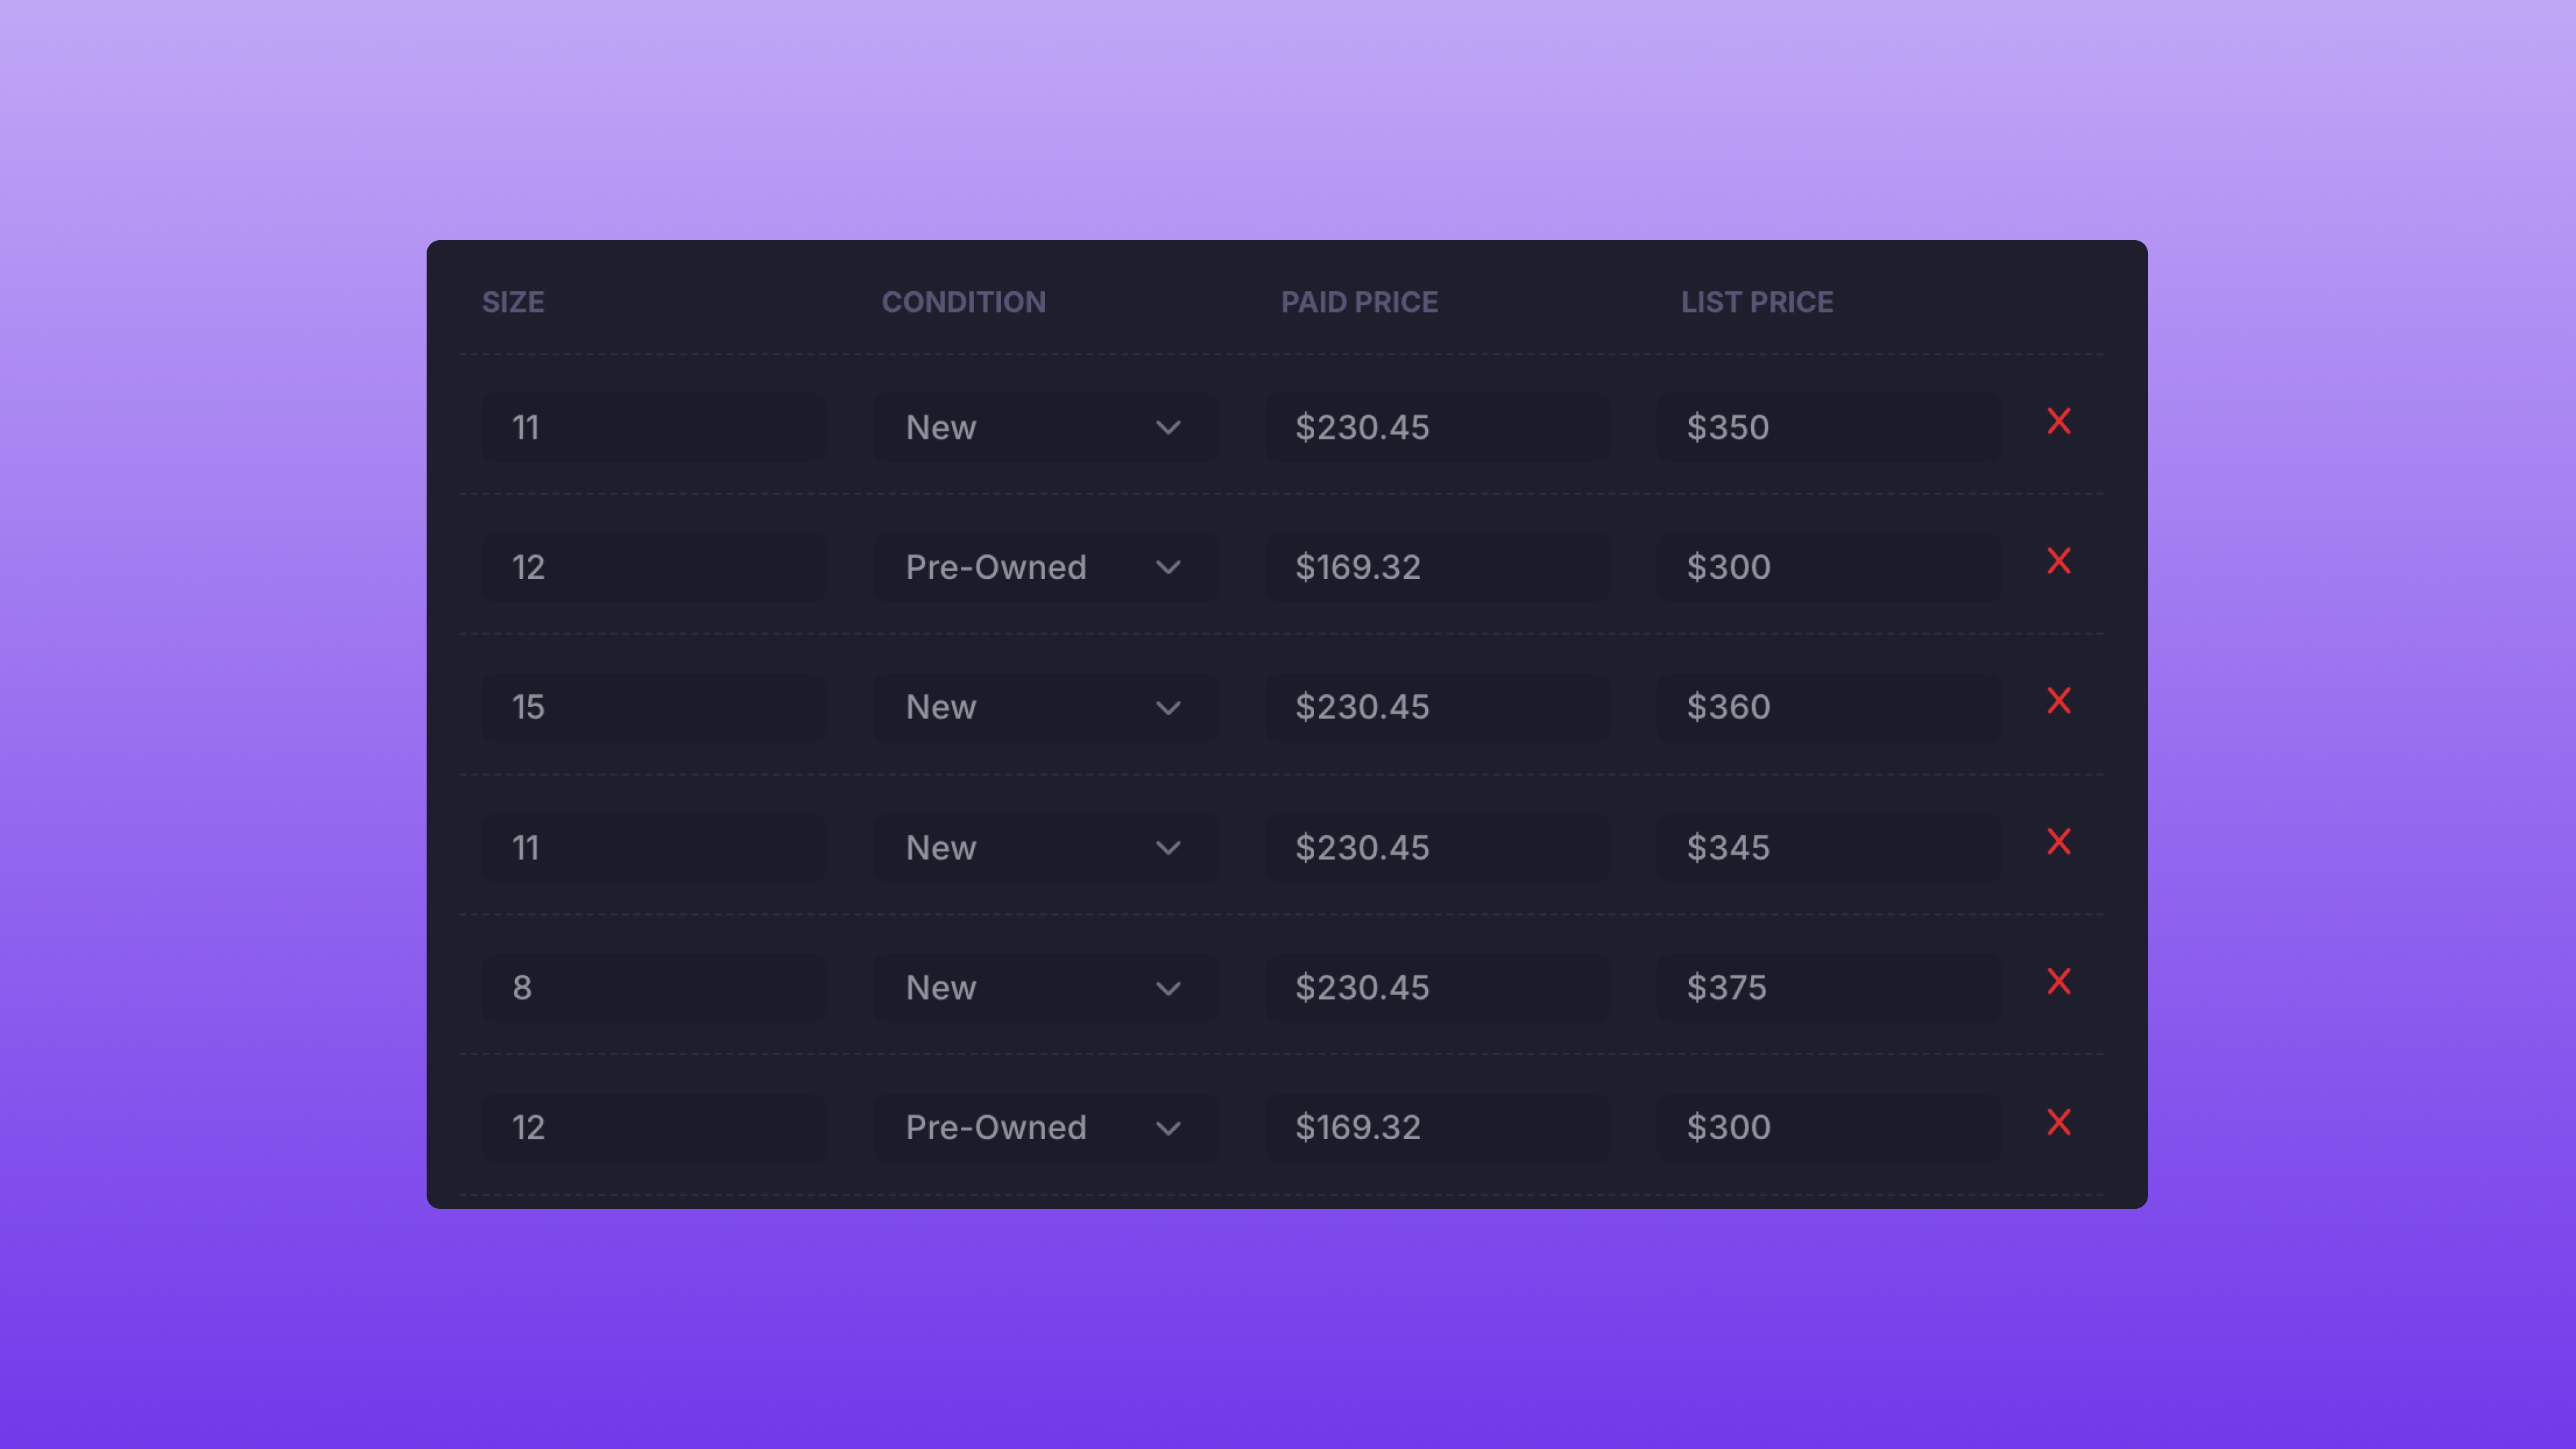 If you made a mistake, simply click the **X** icon, and the row will be deleted.
If the information is correct, click **Onboard Items,** and the Items will be onboarded within Bind. You'll also be redirected to the [Product Overview](/platform/catalog/product-overview).
## After Onboarding
Once the Items have been onboarded, the [Item Labels](/platform/labels/item-labels) will be available in the Labels page.
If you made a mistake, simply click the **X** icon, and the row will be deleted.
If the information is correct, click **Onboard Items,** and the Items will be onboarded within Bind. You'll also be redirected to the [Product Overview](/platform/catalog/product-overview).
## After Onboarding
Once the Items have been onboarded, the [Item Labels](/platform/labels/item-labels) will be available in the Labels page.